Rental Resource Management
You can add and manage rental resources easily following the below steps.
Product Setup >> Resources
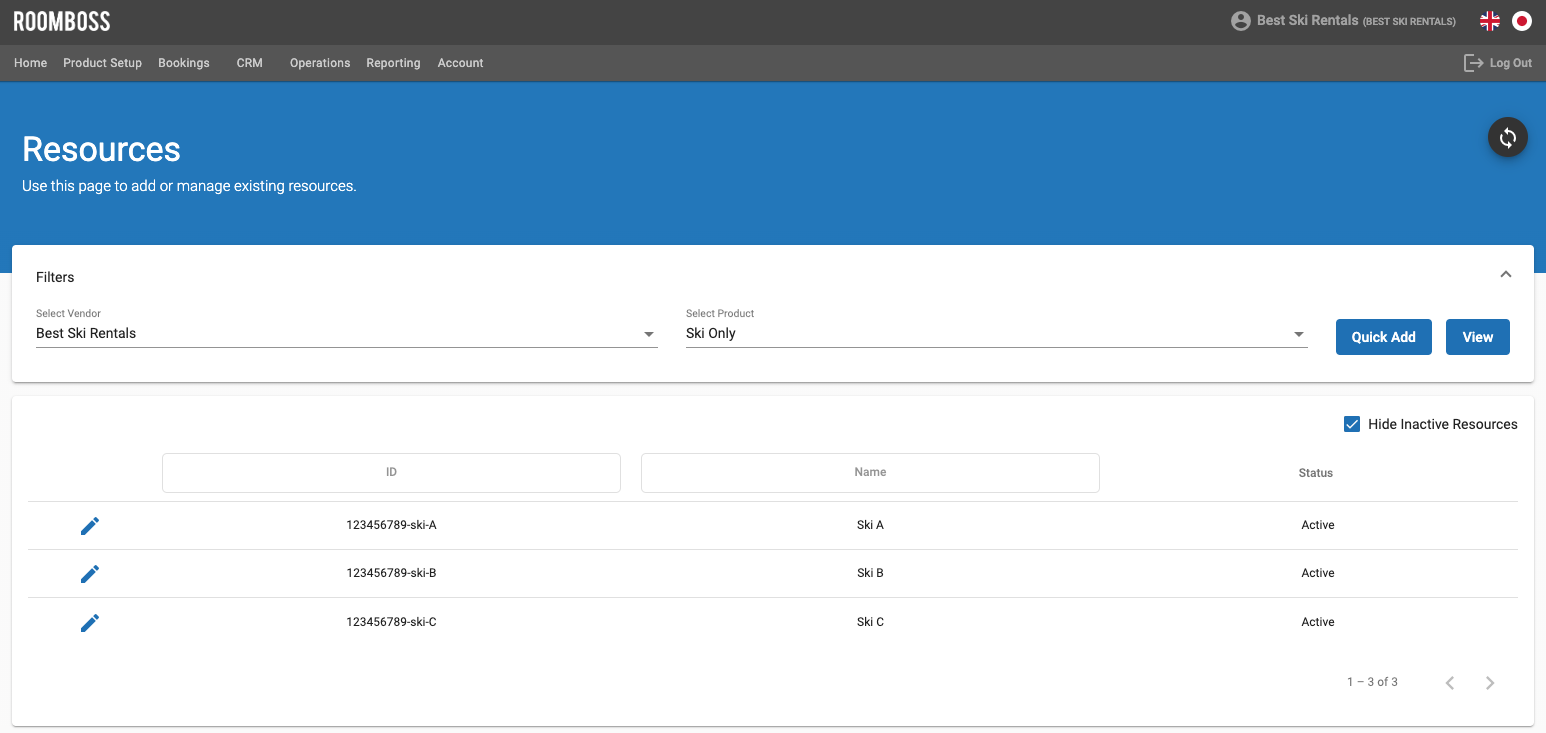
Viewing Resources for Each Product
- Choose a vendor
- Choose a product
- Click "View"
- The resources added for the product will be listed in the page
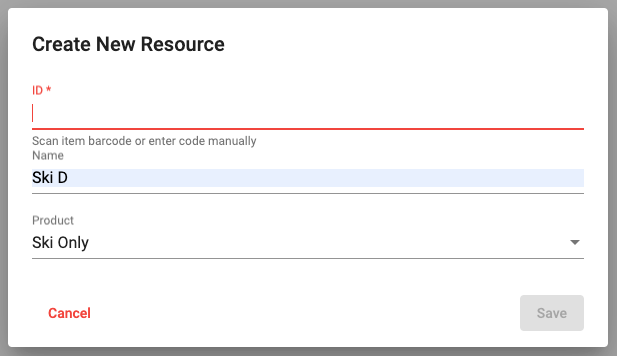
Adding Resources from "Quick Add"
-
Choose a vendor
-
Choose a product
-
Click "Quick Add"
-
(Optional) Add a Name for this resource
-
Make sure the ID* column is focused before scanning / manually typing
-
After you scan the barcode / enter the barcode manually, it is automatically saved to the resource.
Adding Resources from "+ icon" on the bottom page
- Choose a vendor
- Choose a product
- Click "View"
- Click a + icon

- Follow the same step from Setup 4 in 'Adding Resources from "Quick Add"' section
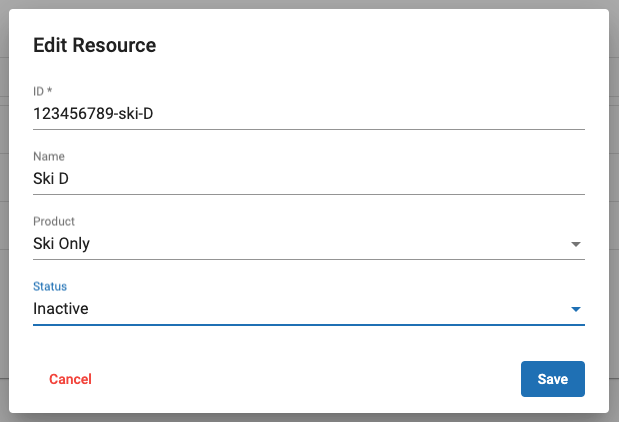
Editing Resources for Each Product
- Choose a vendor
- Choose a product
- Click "View"
- Click Edit icon
 for the resources you want to edit
 - After you finish editing the resource, click "Save"
Making Resources Inactive
Please note that we cannot delete the resources, we can only make them inactive.
-
Choose a vendor
-
Choose a product
-
Click "View"
-
Click Edit icon
for the resources you want to make inactive -
Change the status to "Inactive"
-
Click "Save"
info
You can also view the inactive resources from unticking "Hide Inactive Resources" on the right hand side. And you can change back from inactive to active if needed.